
Difficulty
Moderate
Steps
19
Time Required
- Measure Your Wrapping Paper—Part 1 3 steps
- Cut the Wrapping Paper 1 step
- Polish Edges 1 step
- Measure Your Wrapping Paper—Part 2 3 steps
- Wrap the Box 6 steps
- Add a Bow 1 step
- Tie a Bow 2 steps
- Attach a Card 2 steps

Featured Guide
This guide has been found to be exceptionally cool by the site's staff.
Introduction
Getting presents is fun. Giving presents is even more fun. Take the time to give your gifts a polished look with Dozuki's Holiday How-To guide. Wrapping can be quick and easy—and our guide will make you a present pro in no time.
-
-
Roll the wrapping paper out until there is plenty of space to place the present on the paper.
-
Take the edge of the wrapping paper and fold it across the top of the present. Stop when you've reached the halfway point of the box.
-
-
-
Holding the edge of the paper in place, roll the entire present over—toward the wrapping paper roll.
-
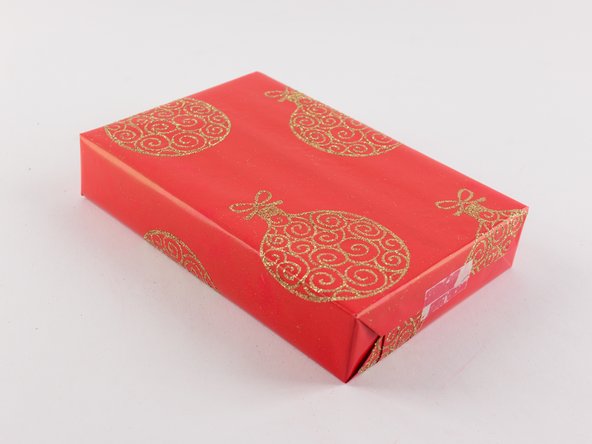
The present should be completely surrounded in the wrapping paper—with a bit of overlap.
-
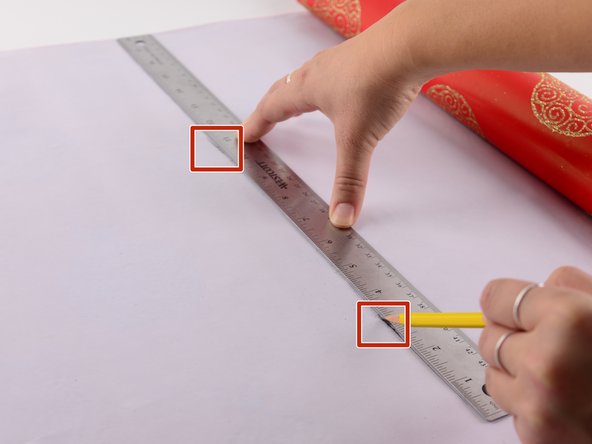
Using a pencil, make two marks on the wrapping paper where the edge of the present stops.
-
Some wrapping paper will have dotted lines or a grid printed on its inside. These pre-printed patterns are meant to help you in lieu of this step.
-
Unwrap the present from the wrapping paper to expose your pencil marks.
-
-
-
Move the present out of your way, off of the wrapping paper.
-
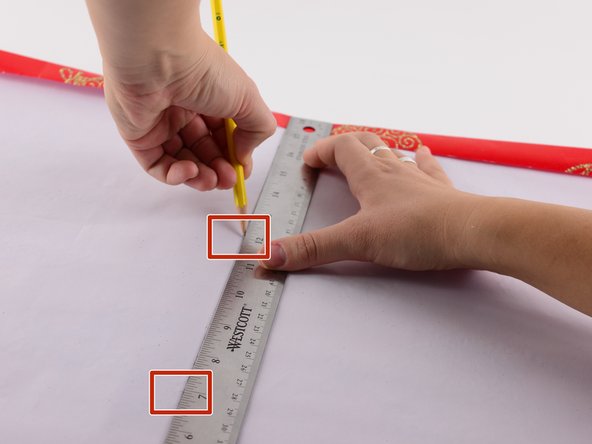
Take your ruler and line it up with your two pencil markings.
-
Draw a line down the entire length of the wrapping paper.
-
-
-
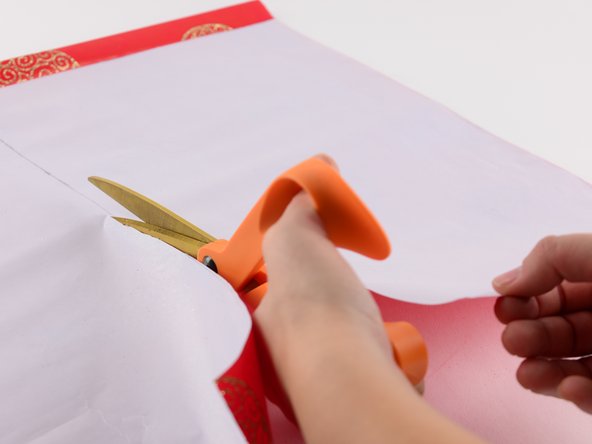
Use your scissors to cut along the line you just made.
-
Set the remainder of the wrapping paper roll aside. You no longer need it.
-
-
-
The edges of your cut wrapping paper may not be polished. Fix that by folding over the edge of the paper about half an inch. Smooth the fold out with your fingers.
-
-
-
Place the present on the wrapping paper, with the folded edge on the right.
-
Move the present towards the bottom edge of the wrapping paper. Fold up the paper to cover about 2/3rds of the side of the box.
-
-
-
Keeping the box touching the paper, lift it up onto its side.
-
With your pencil, mark the wrapping paper about 2/3rds up the length of the area in contact with the paper.
-
Make a similar mark on the other side of the box.
-
-
-
Move the present out of your way, off of the wrapping paper.
-
Take your ruler and line it up with your two pencil markings.
-
Draw a line down the entire length of the wrapping paper.
-
Use scissors to cut along the line you just made.
-
You now have a piece for wrapping paper that it the correct size for your present. Get rid of the excess paper.
-
-
-
Place the present back on the wrapping paper.
-
Ensure you orient the present so that it is centered on the wrapping paper. The folded edge from Step 5 should be to the right of the box.
-
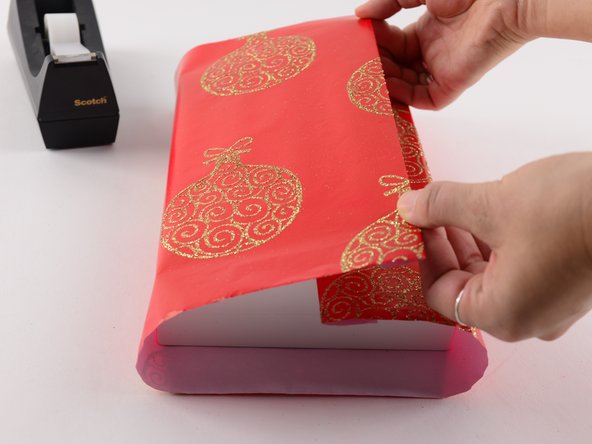
Bring the wrapping paper across the right side of the present until it meets the center of the box.
-
Use a single piece of tape to secure the wrapping paper.
-
-
-
Similar to Step 5, polish the left edge of the wrapping paper.
-
Fold over the edge of the left side of the paper about half an inch. Smooth down the fold with your fingers.
-
-
-
Take the just folded edge and fold it over the left side of the present.
-
Pull the paper tight so the present is snug.
-
Don't pull too hard or the paper may rip!
-
Use a single piece of tape to secure the wrapping paper.
-
-
-
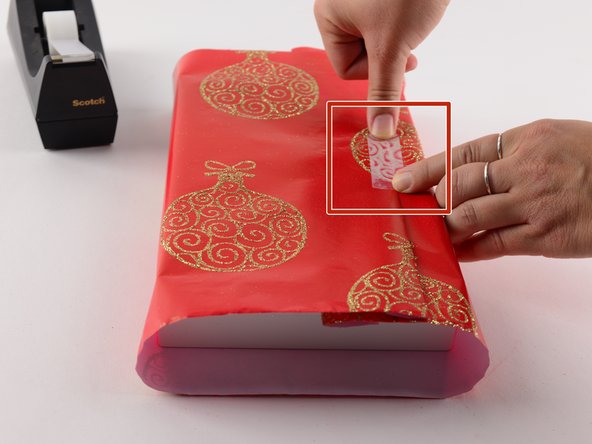
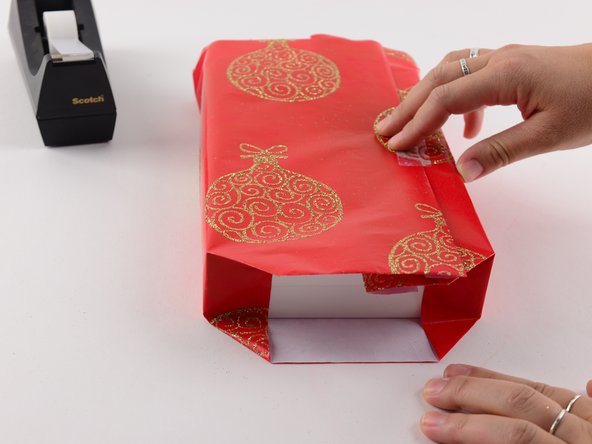
On the bottom and top of present—where the box is still exposed—you'll make several folds.
-
In the first photo, we completed the left side, but allowed the right side to remain unfolded for your comparison.
-
Use two fingers to push in the u-shaped edge of the wrapping paper.
-
Once the paper touches the box, fold down both the bottom and top of the wrapping paper. They should look like triangular wings.
-
-
-
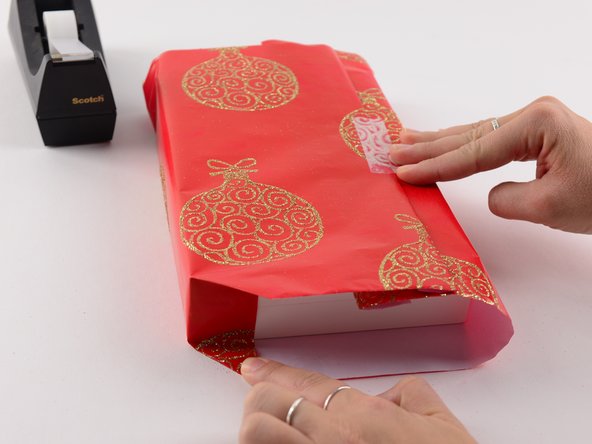
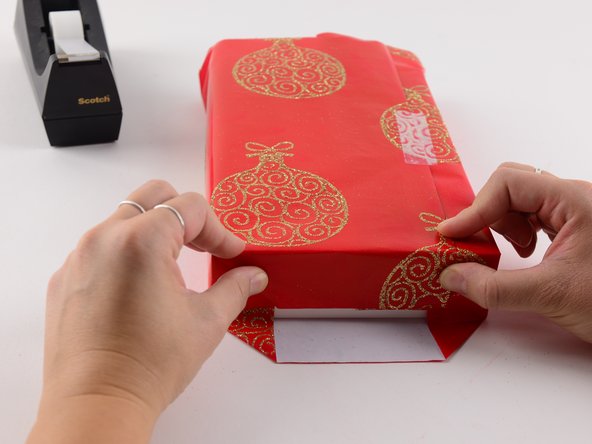
All corners of the bottom section of the wrapping paper should be creased.
-
Fold down the top flap of the wrapping paper and make a crease.
-
Take the bottom flap and make a small fold, about a quarter of an inch.
-
-
-
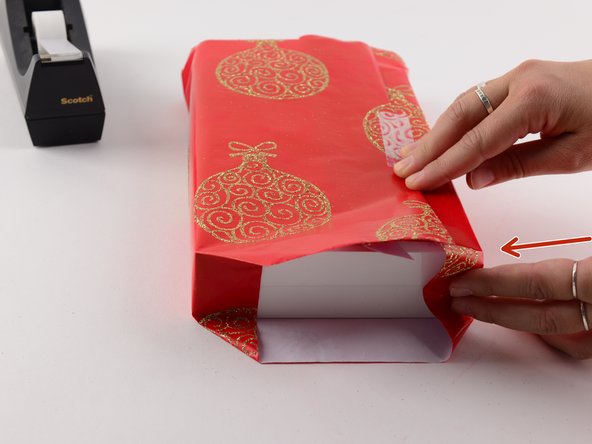
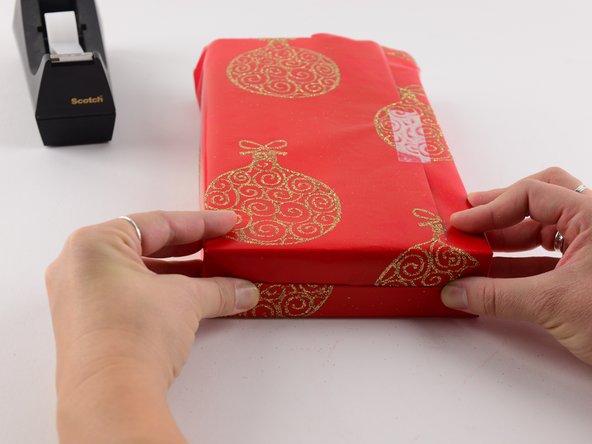
While holding the top fold down, bring the bottom fold up.
-
Use a single piece of tape to secure this two-sided fold.
-
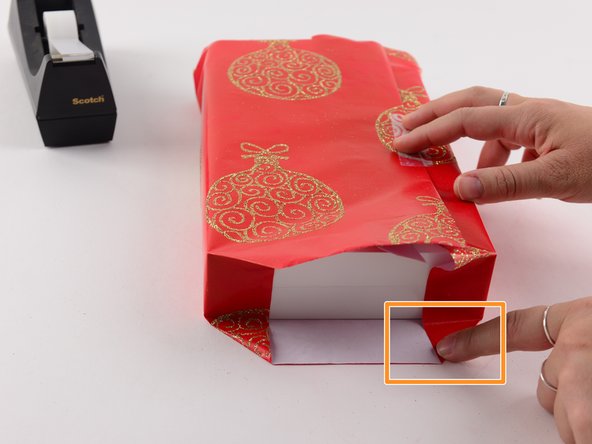
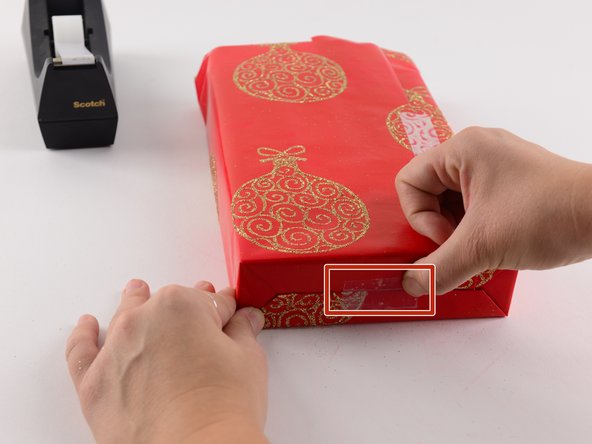
Repeat Steps 12-14 for the other exposed side of the present.
-
The last photo in this step shows the wrapped present facing upward.
-
-
-
Face the back side of the present (indicated by the piece of tape) upward. Feed some ribbon underneath the present perpendicular to the orientation you want your bow to appear.
-
Do not cut the ribbon yet. Though you'll want to unravel a bit more ribbon than you think you need for the bow. You can always trim it later.
-
Tie a single knot with the two ends of the ribbon.
-
Pull tight and press down on the knot to make it flat.
-
-
-
Flip the present over so the knot you just made is facing down on the table.
-
Bring the ends of the ribbon around the present.
-
Align the side of the ribbon feeding into the roll with the ribbon's loose end. Both sides of the ribbon should be roughly the same length.
-
Cut the ribbon loose of the roll.
-
Tie a knot with your two ends of the ribbon and pull it tight.
-
Similar to Step 15, pull and press down on the knot to make it flat.
-
-
-
-
Trim the ends of the ribbon as needed.
-
-
-
Choose a festive card or tag.
-
Glue or tape onto the present.
-
-
-
Write your holiday message.
-
"Happy Holidays! —Dozuki"
-


Cancel: I did not complete this guide.
One other person completed this guide.
